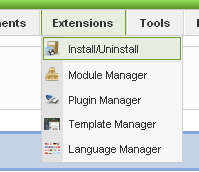
Note – The lytebox script is by default disabled. If you wish to use it you must enable this script in the template’s configuration area. This also includes site shaper installations.
The already enabled LyteBox feature gives your site a dazzling picture display!
Make sure to click on each of the examples.
LyteBox comes pre-installed with this template just follow the tutorials below to setup your images.
Single Image Example

To enable use the following around any image:
<a href=”http://www.yoursite.com/images/popup.jpg” rel=”lytebox” title=”Your Description.”><p align=”center”><img class=”boxed” src=”http://www.yoursite.com/images/thumbnail.jpg” alt=”Description” width=”214″ height=”61″ /></p></a>
Grouped Images Example


To enable use the following around any group of images:
<a href=”http://www.yoursite.com/images/popup1.jpg” rel=”lytebox
” title=”Your Description”><p align=”center”><img class=”boxed” src=”http://www.yoursite.com/images/thumbnail1.jpg” alt=”Description” width=”214″ height=”61″ /></p></a>
<a href=”http://www.yoursite.com/images/popup2.jpg” rel=”lytebox
” title=”Your Description”><p align=”center”><img class=”boxed” src=”http://www.yoursite.com/images/thumbnail2.jpg” alt=”Description” width=”214″ height=”61″ /></p></a>
<a href=”http://www.yoursite.com/images/popup3.jpg” rel=”lytebox
” title=”Your Description”><p align=”center”><img class=”boxed” src=”http://www.yoursite.com/images/thumbnail3.jpg” alt=”Description” width=”214″ height=”61″ /></p></a>
Slideshow Example


To enable use the following around any group of images:
<a href=”http://www.yoursite.com/images/popup1.jpg” rel=”lyteshow
” title=”Your Description”><p align=”center”><img class=”boxed” src=”http://www.yoursite.com/images/thumbnail1.jpg” alt=”Description” width=”214″ height=”61″ /></p></a>
<a href=”http://www.yoursite.com/images/popup2.jpg” rel=”lyteshow
” title=”Your Description”><p align=”center”><img class=”boxed” src=”http://www.yoursite.com/images/thumbnail2.jpg” alt=”Description” width=”214″ height=”61″ /></p></a>
<a href=”http://www.yoursite.com/images/popup3.jpg” rel=”lyteshow
” title=”Your Description”><p align=”center”><img class=”boxed” src=”http://www.yoursite.com/images/thumbnail3.jpg” alt=”Description” width=”214″ height=”61″ /></p></a>


