How To Setup the Search Box and Menus

1. Search Setup

  • Publish the default Joomla search module or the S5 Live Search module to the ‘search’ position.
  • Set the width of the search to 35 in the module’s backend.
  • This position was only designed for search modules, not content.

2. Column Menu Setup

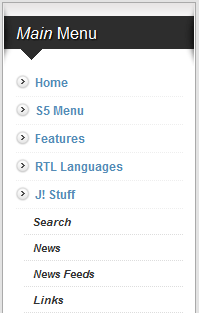
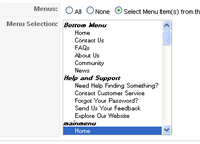
  • Publish any menu module to the main body module positions on your site.
  • There should be no menu style suffixes applied under advanced parameters.
  • The menu style should be set to list.
  • You may assign any of this template’s module class suffixes.

3. Sub Menu Setup

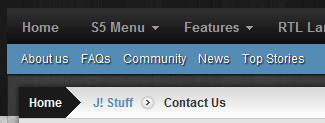
  • Publish any menu to the ‘sub_menu’ position.
  • There are no menu style suffixes applied under advanced parameters.
  • The menu style should be set to list

4. Bottom Menu Setup

  • Publish any menu to the ‘bottom_menu’ position.
  • There are no menu style suffixes applied under advanced parameters.
  • The menu style should be set to list


Custom Page and Column Widths

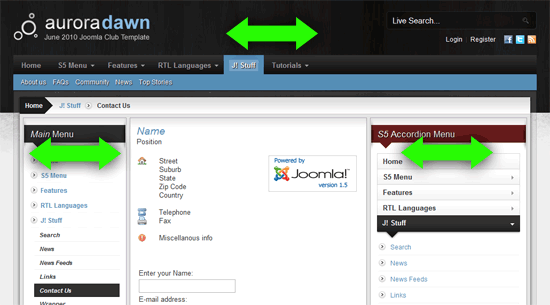
Aurora Dawn allows for both a fixed and a fluid width layout. You can either set your site to be a certain pixel width or set it to fluid so it stretches to a specified percentage to take up the majority of the user’s screen. In addition you can easily set your own module column widths as well! This template gives you the ability to set your own width for the positions listed below.

1. Page body width

2. Left column width (not shown, appears left of the main body

3. Right column width

All of this is done very easily in the template configuration.


LyteBox Setup Tutorial

Note – The lytebox script is by default disabled. If you wish to use it you must enable this script in the template’s configuration area. This also includes site shaper installations.

The already enabled LyteBox feature gives your site a dazzling picture display!

Make sure to click on each of the examples.

LyteBox comes pre-installed with this template just follow the tutorials below to setup your images.

Single Image Example

one

To enable use the following around any image:

<a href=”http://www.yoursite.com/images/popup.jpg” rel=”lytebox” title=”Your Description.”><p align=”center”><img class=”boxed” src=”http://www.yoursite.com/images/thumbnail.jpg” alt=”Description” width=”214″ height=”61″ /></p></a>

Grouped Images Example

Description Description Description

To enable use the following around any group of images:

<a href=”http://www.yoursite.com/images/popup1.jpg” rel=”lytebox

” title=”Your Description”><p align=”center”><img class=”boxed” src=”http://www.yoursite.com/images/thumbnail1.jpg” alt=”Description” width=”214″ height=”61″ /></p></a>
<a href=”http://www.yoursite.com/images/popup2.jpg” rel=”lytebox ” title=”Your Description”><p align=”center”><img class=”boxed” src=”http://www.yoursite.com/images/thumbnail2.jpg” alt=”Description” width=”214″ height=”61″ /></p></a>
<a href=”http://www.yoursite.com/images/popup3.jpg” rel=”lytebox ” title=”Your Description”><p align=”center”><img class=”boxed” src=”http://www.yoursite.com/images/thumbnail3.jpg” alt=”Description” width=”214″ height=”61″ /></p></a>

Slideshow Example

Description Description Description

To enable use the following around any group of images:

<a href=”http://www.yoursite.com/images/popup1.jpg” rel=”lyteshow ” title=”Your Description”><p align=”center”><img class=”boxed” src=”http://www.yoursite.com/images/thumbnail1.jpg” alt=”Description” width=”214″ height=”61″ /></p></a>
<a href=”http://www.yoursite.com/images/popup2.jpg” rel=”lyteshow ” title=”Your Description”><p align=”center”><img class=”boxed” src=”http://www.yoursite.com/images/thumbnail2.jpg” alt=”Description” width=”214″ height=”61″ /></p></a>
<a href=”http://www.yoursite.com/images/popup3.jpg” rel=”lyteshow ” title=”Your Description”><p align=”center”><img class=”boxed” src=”http://www.yoursite.com/images/thumbnail3.jpg” alt=”Description” width=”214″ height=”61″ /></p></a>


I like what I see! I want to JOIN TODAY.

The Template’s Settings

This template comes loaded with options that you can use to customize your site exactly how you want it. Here’s how to get to these custom settings:

  1. In the backend of Joomla go menu item Extensions/Template Manager.
  2. Click on the title of the template.
  3. This will bring you to the template manager screen where you can edit the template’s parameters.
  4. Click save when you are done

I like what I see! I want to JOIN TODAY.


Installing The Template

    • Download the installation package from our download section.
    • Once the download is complete go to the backend of Joomla.
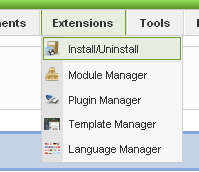
    • Navigate through your menu system to Extensions/Install Uninstall.


    • Once at the installation screen click the browse button and navigate to where you downloaded the template file.
    • Once you have the file selected click 'Upload File and Install'
    • The template is now installed, now let's set it as the default template:

    • Navigate through your menu system to Extensions/Template Manager.
    • Find the radio button next to the newly installed template.
    • Click on the Default button at the top right of the screen and you're done!


Module Positions and Styles

On this page you will see all the module styles and module positions available plus how to setup each of them.

All modules are fully collapsible!

How to install and setup module styles:

  1. Download any module you wish to publish to your site.
  2. In the backend of Joomla navigate to the menu item Extensions/Install Uninstall
  3. Browse for the module’s install file and click Upload File & Install.
  4. Once the module has be installed navigate to the menu item Extensions/Module Manager (same menu as above)
  5. Find the Module just installed and click on it’s title.
  6. Change any parameters that you wish and be sure to set it to published and publish it to your desired module position.
  7. To apply a module style simply fill in the module class suffix field with any of this template’s included module styles. This parameter setting is found under Module Parameters on the right side of the screen.
  8. Assign what pages you would like the module to appear on and finally click Save.


S5 Menu With Multiple Effects

The S5 Menu system gives you the option to choose between the jQuery or the S5 Effects scripts to power your site menus. The demo here is all running the jQuery menu system. You can easily switch to the S5 Effects library via your template parameters area in Joomla (extensions > template manager > select the template and click edit)

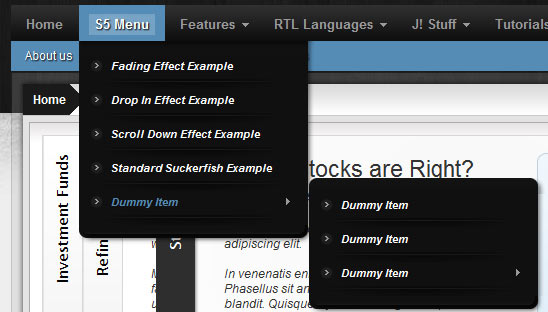
The S5 jQuery menu functions just like the S5 No-MooMenu except it is powered by jQuery. To demo the menu just mouse over the top menu and you will notice the menu smoothly expand and fade in.

Menu screenshot:


4 Options:

I like what I see! I want to JOIN TODAY.

Typography Options

This is a sample blockquote. Use <blockquote><p>Your content goes here!</p></blockquote> to create a blockquote.

<div class=”s5_greenbox”> <div class=”tl”> </div> <div class=”tr”> </div> <div class=”bl”> </div> <div class=”br”> </div> Your text here </div> </div>

<div class=”s5_redbox”> <div class=”tl”> </div> <div class=”tr”> </div> <div class=”bl”> </div> <div class=”br”> </div> Your text here </div> </div>

<div class=”s5_bluebox”> <div class=”tl”> </div> <div class=”tr”> </div> <div class=”bl”> </div> <div class=”br”> </div> Your text here </div> </div>

<div class=”s5_graybox”> <div class=”tl”> </div> <div class=”tr”> </div> <div class=”bl”> </div> <div class=”br”> </div> Your text here </div> </div>

This is a styled box. Use <div class="black_box">Your content goes here!</div>

This is a styled box. Use <div class="gray_box">Your content goes here!</div>

This is a styled box. Use <div class="red_box">Your content goes here!</div>

This is a styled box. Use <div class="blue_box">Your content goes here!</div>

This is a styled box. Use <div class="green_box">Your content goes here!</div>

This is a styled box. Use <div class="yellow_box">Your content goes here!</div>

This is a styled box. Use <div class="orange_box">Your content goes here!</div>

This is an image with the “boxed” class applied:

This is an image with the “boxed_black” class applied:

This is an image with the “padded” class applied:

Heading 1

Heading 2

Heading 3

Heading 4

Heading 5

This is a sample code div. Use <div class="code">Your content goes here!</div> to create a code div.

#s5_code { width: 30px; color: #fff; line-height: 45px; }

  1. This is an Ordered List
  2. Congue Quisque augue elit dolor nibh.
  3. Condimentum elte quis.
  4. Opsum dolor sit amet consectetuer.

  • This is an Unordered List
  • Congue Quisque augue elit dolor nibh.
  • Condimentum elte quis.
  • Opsum dolor sit amet consectetuer.

  • This is an Unordered List with class ul_arrow
  • Congue Quisque augue elit dolor nibh.
  • Condimentum elte quis.
  • Opsum dolor sit amet consectetuer.

  • This is an Unordered List with class ul_star
  • Congue Quisque augue elit dolor nibh.
  • Condimentum elte quis.
  • Opsum dolor sit amet consectetuer.

  • This is an Unordered List with class ul_bullet
  • Congue Quisque augue elit dolor nibh.
  • Condimentum elte quis.
  • Opsum dolor sit amet consectetuer.

  • This is an Unordered List with class ul_bullet_small
  • Congue Quisque augue elit dolor nibh.
  • Condimentum elte quis.
  • Opsum dolor sit amet consectetuer.

The following list will support lists up to number 9, add the following class to the UL wrapping the below LI elements, class=”ul_numbers”:

  • This is a sample styled number list <li class="li_number1">Your content goes here!</li>
  • This is a sample styled number list <li class="li_number2">Your content goes here!</li>
  • This is a sample styled number list <li class="li_number3">Your content goes here!</li>
  • This is a sample styled number list <li class="li_number4">Your content goes here!</li>